Memcached is a caching technology used by some PHP applications to speed up page load times by reducing the amount of processing needed to render the result and send it to your browser. It is often used alongside other caching systems to speed up sites considerably.
Some PHP applications have native support for Memcached, but WordPress also has the option of using this system when you use the Litespeed Caching plugin.
The Litespeed Caching plugin on its own is pretty capable, but unfortunately Memcached is not enabled by default. Some extra setup is required. The following section will detail how to get Memcached working with the Litespeed Cache plugin for WordPress, but if you want to use Memcached with another PHP application that supports it, the connection settings should be the same.
Getting Memcached Working with Litespeed Cache for WordPress
Before you can get Memcached working, one minor tweak to your PHP settings is required. Start by logging into your cPanel, and find the ‘Select PHP version’ icon.
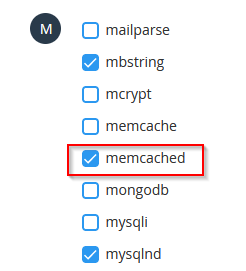
 From there, You’ll see your current PHP version, and below that, a big array of checkboxes, one for each possible PHP extension you can enable. Head down to the ‘M’ section and enable ‘memcached’. If you see a ‘memcache’ (without the ‘d’) you can ignore that one. It should look like this:
 That’s all the setup you need from cPanel. The rest of the setup will be done inside your wp-admin:
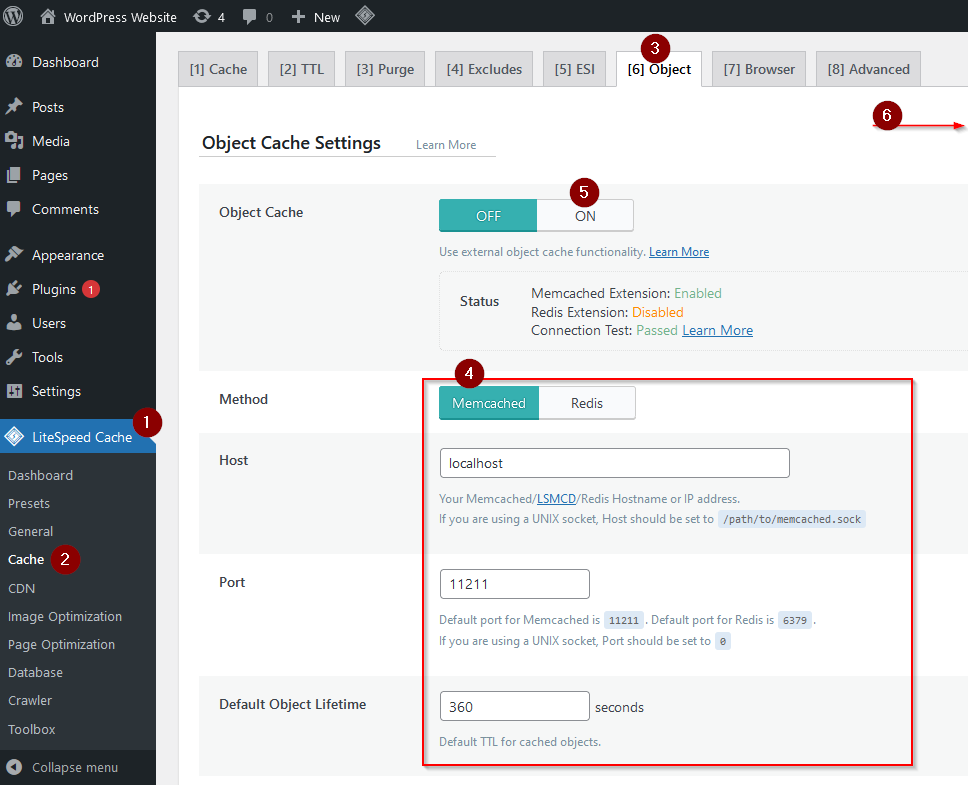
- Inside wp-admin, expand the ‘Litespeed Cache’ section
- Click ‘Cache’ from the submenu
- Click on the ‘Object’ tab at the top.
- Make sure ‘Memcached’ is selected, and that the Host and Port settings match the image above. Further down, the Username and Password should be left blank. The defaults usually work here.
- Toggle the Object Cache setting to ‘ON’
- Click the ‘Save Changes’ button at the top right corner of the page.
That’s it! You’re finished setting up Memcached. If you use a different application that has memcached support it will ask for all the same connection details as what was pictured here, but the exact steps to enable Memcached in your application may be different.