This article will show you how to Clone and Copy WordPress installations using the WordPress Toolkit inside cPanel available to our Plus Web Hosting plans. This is great if you’re trying to create a Staging site for WordPress.
Preparation
Even though these tools are quite advanced and automated, it’s still important to keep your own backups! The following tools will do everything they can to prevent data loss or permanent damage to your sites, but you can never be too careful with your data! Backup your website, especially if you’re transferring data from one WordPress installation to another!
Creating Your First Staging Site Clone
A Staging Site is a copy of your WordPress website where you can make and test changes before publishing them to your live website. With the WordPress Toolkit, creating a staging site is user-friendly.
If you ever want to test updates or develop a new version of your content or themes an a new copy of your existing site, this is where you start. You only need to do this once. After you’ve made your copy you can use the Copy tools shown below to copy your data back and forth between the two WordPress installations.
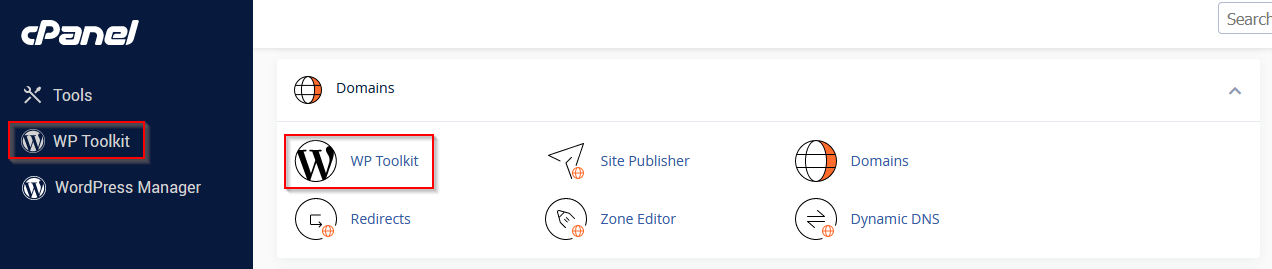
In your cPanel, look for the WordPress Toolkit icon, and click it.
 This page will show you all your current WordPress installations detected by the toolkit. If your WordPress doesn’t show up in that list, use the “Scan” button at the top to have the toolkit locate and identify your existing WordPress installation. Expand the panel for your installation, and you should see something like this:
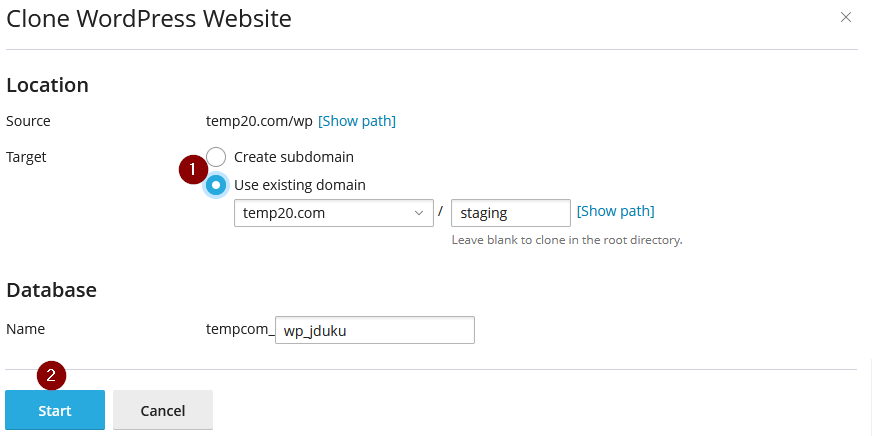
 For your first copy, use the ‘Clone‘ button. It will ask you for some information, such as what URL you want the new clone to use, as well as some other settings that you can leave default. Just specify what URL you want your clone to live on, and click start.
Copying/Staging WordPress
If you’ve already made your copy and have completed the tests you wanted to do, or you’ve developed something on the copy you want to transfer back to the original version, or if you want to update your staging site copy with an updated copy of your original, follow along.
Just like before, open the WordPress Toolkit, and press the ‘copy‘ button this time.
You should get something that looks a bit like this:
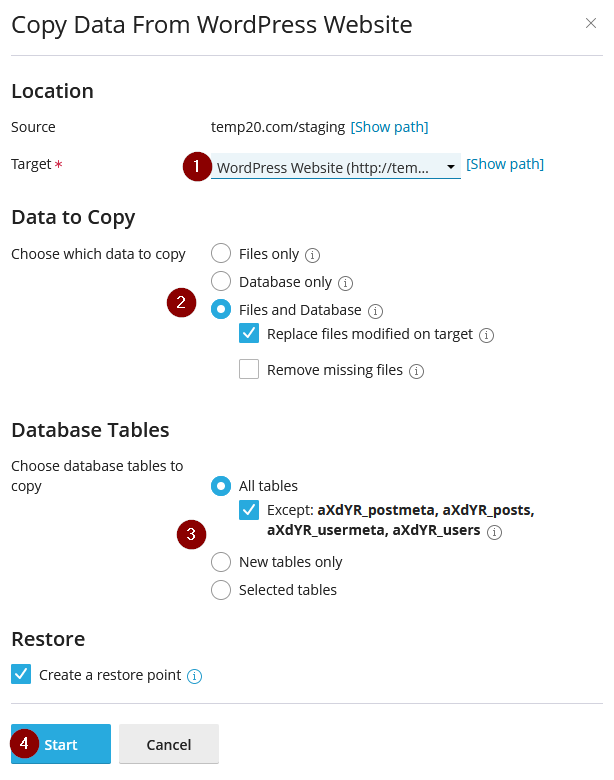 On this panel, the first thing you do is select which existing WordPress installation you’re going to copy your data into. Then you select What data you’re going to migrate. This will change depending on what you did with the Staging copy and why it was created.
If you choose to migrate Database records, by default it will exempt certain tables that contain user login details, posts, and comments. If you want these copied, make sure to uncheck the exception!
Just leave the restore point option checked. It’s used by the Toolkit to roll-back the copy if it detects that the copy fails for any reason.
When you’re ready, click Start!