In order to manage and edit the Name Servers for any domains you’ve registered with HostUpon you first need to login to the Client Area.
Step 1 – Find Domain Names
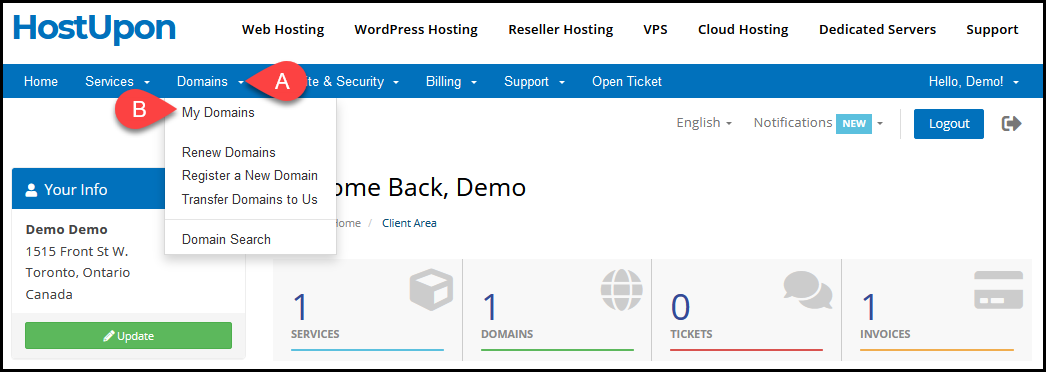
Click Domains and then click My Domains in the top navigation menu.
Step 2 – Manage Domain Name
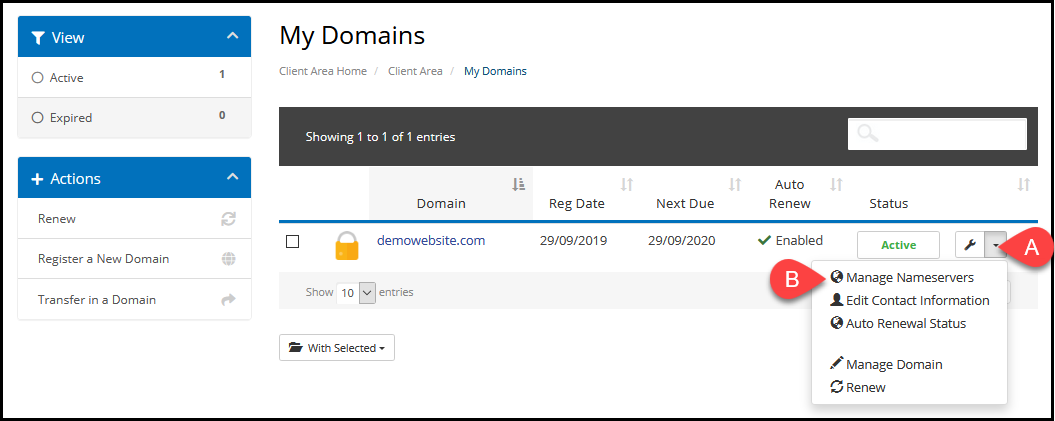
You will see a list of any domain names you have registered with HostUpon. Click the drop-down menu on the far right side beside the domain name you wish to manage (A) and then click Manage Nameservers (B).
Step 3 – Edit Your Name Servers
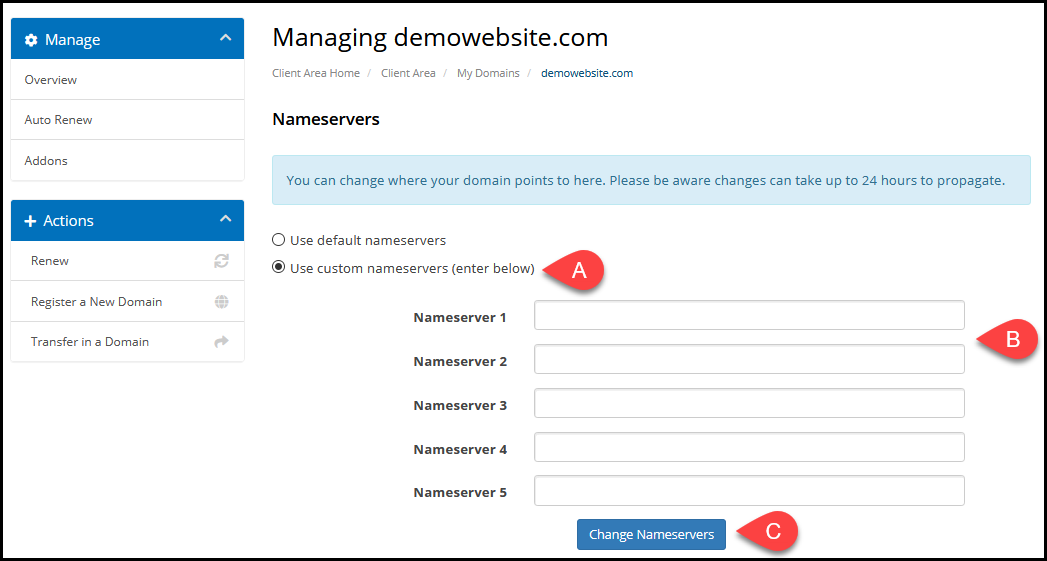
On the Name Servers page you can either use the HostUpon default name servers or choose to use 3rd party custom name servers to point your domain to another provider.
In order to set custom name servers select the Use custom nameservers option (A) and then enter your name servers in the fields (B) and click the Change Nameservers button (C) to save the changes.