With so many people using WordPress, we’ve always been asked on how you can setup a staging environment so that you can preview your changes before publishing them to your live WordPress site. Today we’ll go over a new feature in the Softaculous one-click installer that allows you to do just that.
What is WordPress Staging ?
A staging environment is basically a copy of your live website where you can apply changes, add plugins and themes before you make them live. The idea behind this is to give you a carbon copy of your website to work on without impacting your live website. You can preview changes before publishing them which is a great way to test out a new theme or a plugin without breaking your live site.
How the new WordPress staging tool works
Important: In order to use the staging tool for WordPress you would have had to installed the ‘live’ version of your site using the Softaculous installer. If you installed WordPress manually by uploading the files to your hosting account then you will not be able to use the staging tool in Softaculous.
Once you’ve installed WordPress using the Softaculous one-click installer, you’ll be able to use the staging tool to create a copy of your live site with just one click. Once you’ve created the staging copy of your WordPress site you’ll be able to to test themes, plugins, add new pages or make other changes to your website in the staging environment. When you’re ready, you can then push these changes to the live version of your website. With the new staging tool you can maintain a ‘staging’ version and ‘live production’ version of your website simultaneously.
Step-By-Step Guide: How To Setup A WordPress Staging Environment
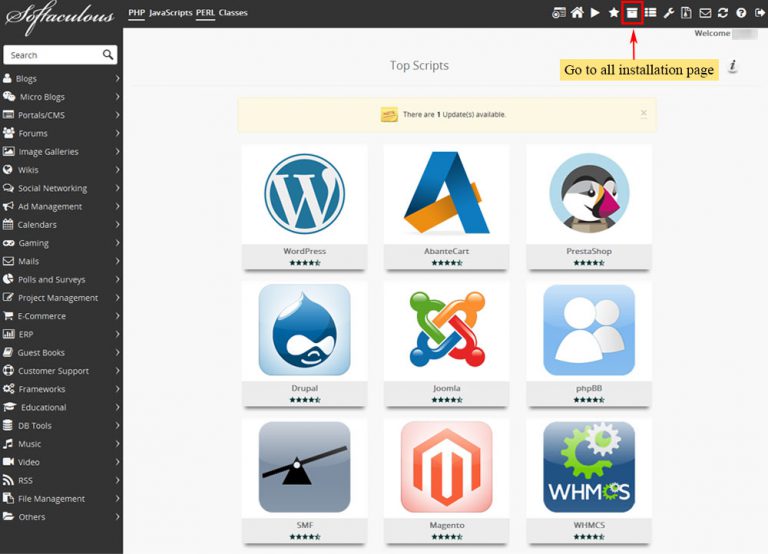
1. First you will need to login to your cPanel control panel by going to yourdomain.com/cpanel and entering your username and password. Once you’re logged in, click the Softaculous icon which loads the Softaculous one-click installer interface. Then click the Installations icon as show in the screenshot below.
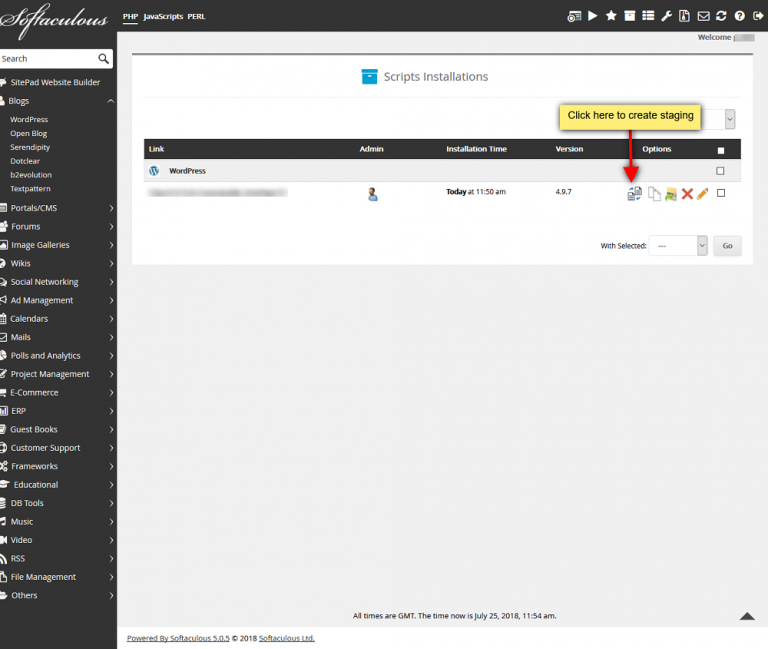
2. Select the WordPress installation you want to create a staging copy for. Then click on the Create Staging icon as show below.
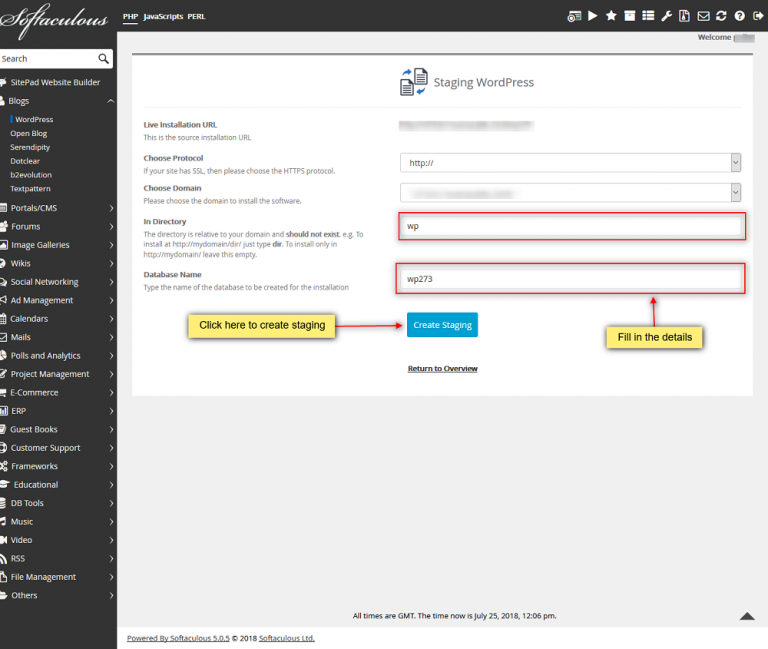
3. You should now be on the Staging WordPress page with a form asking you for the details about the new staging copy you’re creating. Fill in the details in the form as show in the screenshot below and then hit the blue Create Staging button. It’s as simple as that! You’ve now created a staging copy of your live WordPress website. The login details for your WordPress Admin Dashboard on the staging copy are the same as your live copy.
Here are some things you can do in the staging environment:
- install, delete, update or add plugins
- install a new theme and customize it
- update your WordPress version
- Add, edit, delete pages or posts
Once you’re happy with the changes on the staging copy you can push these changes to your live WordPress site with just one click.
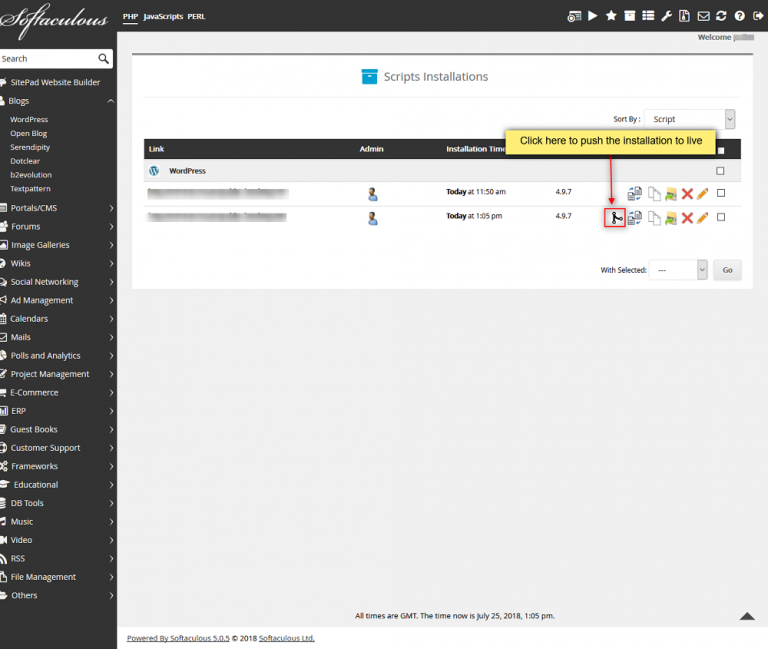
4. In order to push the changes from your staging copy to your live site you need to click the Push to Live button beside the staging copy as show below.
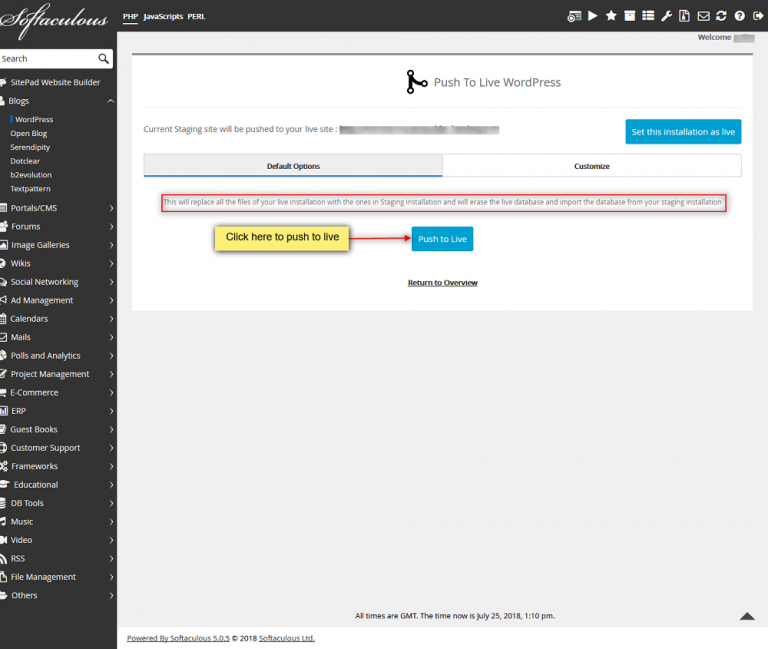
5. Once you click the button you’ll be taken to the Push to Live page where you you’ll have the option of either updating just the files or if you want to push the files and overwrite the database of the live site with the staging copy database. You will see two tabs, Default Options or Customize.
Default Options tab: Selecting the default options will essentially replace ALL files and the database of the live site with the staging copies files and database. Choosing this option will first create a backup of your live site. It will then overwrite all of the files on the live version with those of the staging version. Then it will erase the contents of your live database and replace it with the staging copy database.
Customize tab: Choosing the customize option gives you more control over the changes you push from the staging copy to the live site.
- Push only the staging files to the live site
- Full Database (includes structure changes as well as rows in the database tables)
- Only Database structure
- Only Data from the database tables
Using the Customize option will first create a backup of your live site. Then if you choose to “Overwrite Files/Folders” it will copy the staging files to the live site. The database changes will depend on what option you’ve chosen as show in the screenshot below.

When you’re ready, you can click the blue Push to Live button. You’ll be greeted with a success page and you can then login to your live site with the new changes ready to go!
If you’ve every wanted to create a staging environment for WordPress then the new Softaculous tool is going to be super handy. It does all of the work behind the scenes. The new Softaculous WordPress staging tool is live across all of our servers at HostUpon. We’re always working on ways to help you manage and maintain your websites with ease so you can focus on your business.


Add comment