This tutorial will show you how to use Gmail as your email program for email addresses at HostUpon that you’ve created inside cPanel. This is an alternative to using the Webmail programs we offer. You can read and reply to email accounts that you created in cPanel through the Gmail interface.
How To Use Gmail to Read and Reply to Emails for Your Domain Name
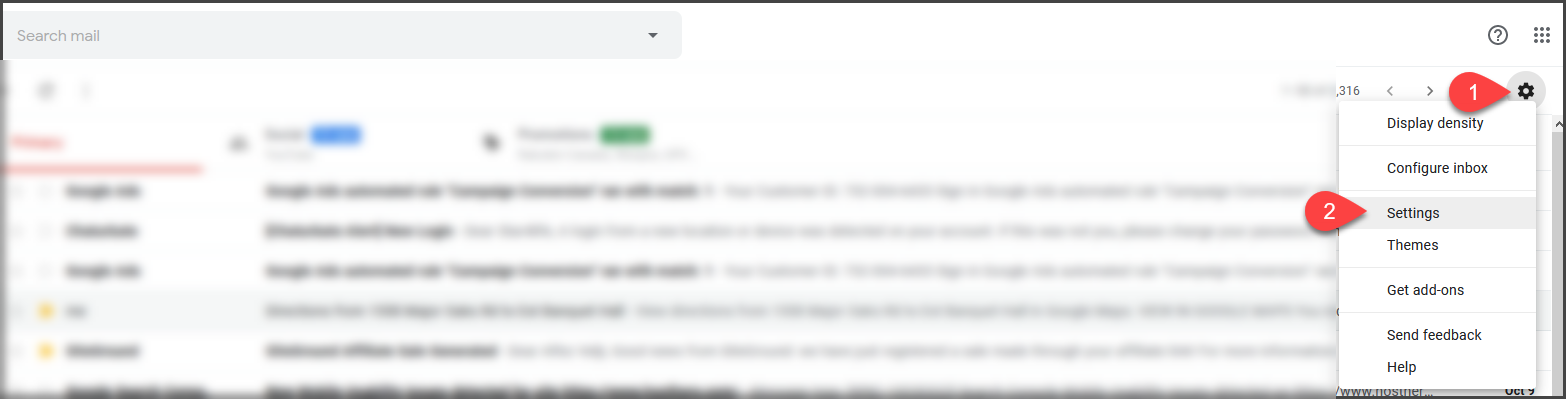
Log in to Gmail and click the gear icon, then the “Settings” link.
Click the “Accounts and Import” tab.

Next to “Check mail from other accounts,” click “Add a mail account.”

An orange popup window will open. Enter the email address that you want to check using Gmail. Click the “Next” button.

Select “Import emails from my other account (POP3),” and click the “Next” button.

Next, you’ll be on the “Add a mail account” page where you enter your current incoming email server settings.
If you’re unsure of the settings, check out the article, What are my incoming and outgoing mail servers.
- Username – Enter your full email address including the @ symbol
- Password – Enter your email account password that you used when you set up the email address in cPanel.
- POP Server – This will be pre-populated with mail.yourdomain.com (yourdomain.com is your actual domain name)
Everything else can be left in its default state.
If you do not intend to use Gmail exclusively, check the box for “Leave a copy of retrieved message on the server,”. This allows you to access your email from another source such as Webmail.
Click the “Add Account” button.

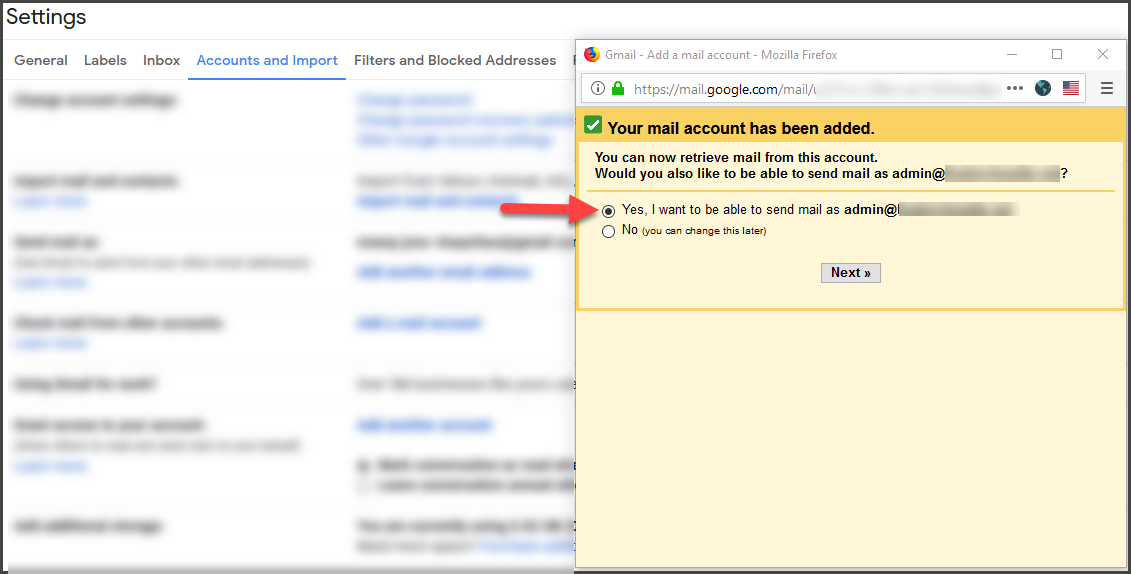
The next window will verify that your email account has been added successfully.
You will also be given the option of being able to send email “as” the new address. If you intend to use Gmail as your only email client, or if you ever want to respond to the incoming mail for your newly set up account, select “Yes, I want to be able to send mail as…” and click the “Next” button.
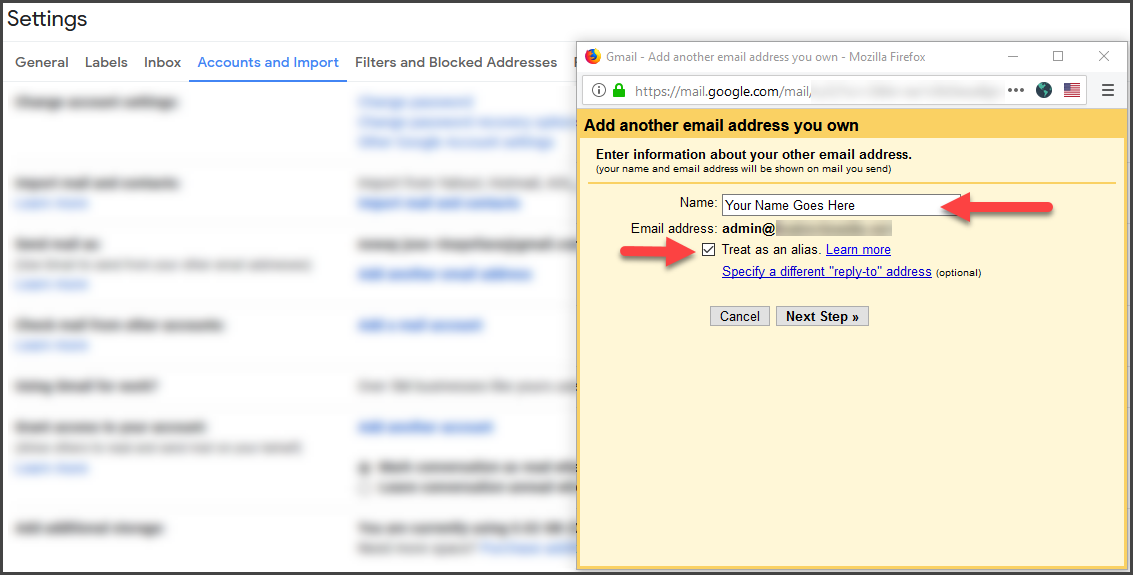
In the next window, enter the name you want to appear as the “sender” or “from” name of the outgoing email.
Leave “Treat as an alias” checked and click the “Next Step” button.
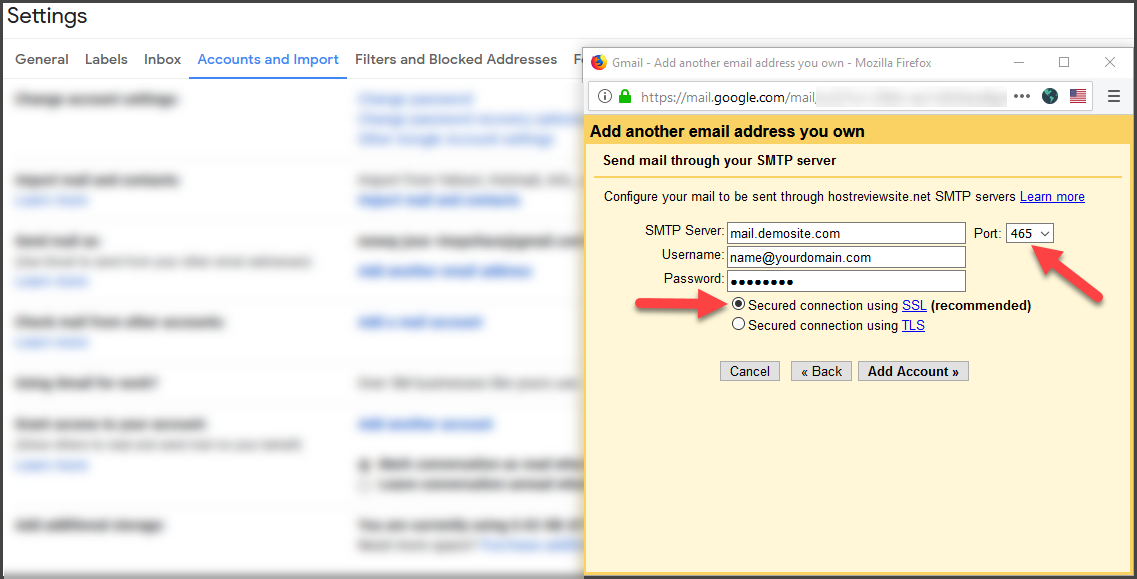
Enter your current outgoing (SMTP) email server settings and click the “Add Account” button. Make sure the port is set to 465 (SSL).
If you’re unsure of the SMTP settings, check out the article, What are my incoming and outgoing mail servers.
Before Gmail will let you send email from the new address they want to verify that you can receive mail there, so they will send you a verification code to the email address you are setting up.
You can click a link in the verification email, or cut and paste the confirmation code in the “Confirm verification and add your email address” box as shown below, and click the “Verify” button.

The popup window will disappear and you’re ready to go!